Friday, November 27, 2015

Boy's Room Demolition

The next room on the demolition list is the boy's bedroom.
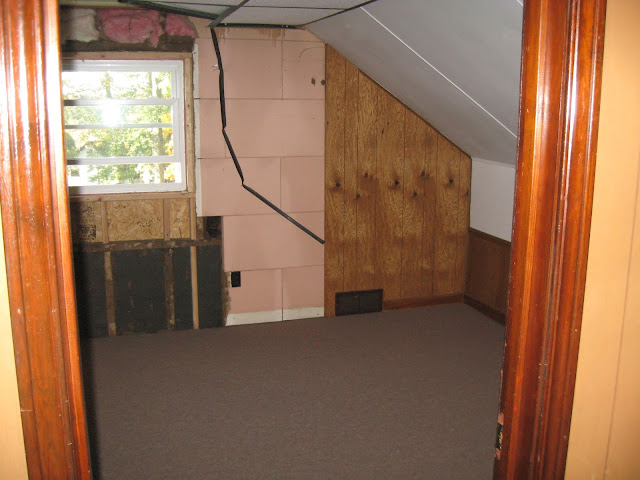
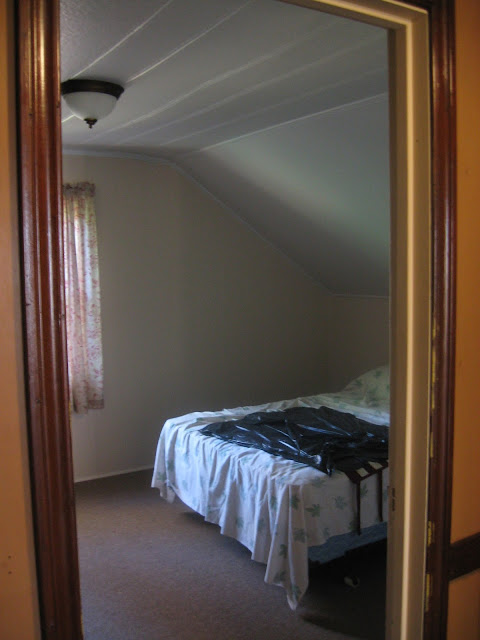
Here are few snaps of what their bedroom used to look like.


The drywall headboard and house wrap wallpaper are a nice touch, don't you think?

When we installed new windows, we knew we were adding on to the back of the house, eventually making this bedroom bigger.  So once we removed the old window we had to board up the hole and install a new window that would be more centered to the new space.  
Since this room is so small, there is no other configuration for the beds.  The heads of the beds were right on the demolition/ reconstruction.  Jagged drywall tends to crumble and make dirt.   So our temporary solution was the house wrap and drywall headboard.  Umm if you can actually use the term "temporary" for well over a year.

 My resident artists felt that their room needed A LOT of art.  
Also note in this picture you can see the original brown window in the wall that used to be the exterior wall.  You can actually look through that window and see the new white window that is in the addition. This wall is going to be ripped out and a beam will replace it since it is a load bearing wall.


And just like that.....It's a construction zone.
This picture was taken from inside the addition...looking through the old brown window.


 Same view after some cleanup.  


This is almost the same viewpoint as the first picture.  
But now the wall and brown window have been removed.  
Now you can see the addition and how much more space it will give the boys. And now their dressers will fit into their bedroom.

We really wanted to replace the tub/shower in our first floor bathroom.  It currently is a two piece unit.  It has leaked a time or two when I had a crazy boy in the bath.  So it was really important for us to replace it with a one piece unit.  The thing is, we needed to buy the unit and get it in the addition before we finished building the walls.   Otherwise, it would never fit through the front door.  

The bathroom remodel is far away yet.  So, the tub unit will have to stay in the boys room until then.  
Gosh, a vanity in the living room and a tub in the boys room.  It's all so crazy around here!
But that vanity should be moving soon.  Plans change!


Monday, October 19, 2015

Changing Plans

Mr. Windmill started tearing apart the upstairs of our house and I like it!  I like it so much that I told him to take it all out...studs and all.  Yep, no more walls.  Just wide open space.  
Check it out!

Left Bedroom 


Right bedroom 

See the four studs on the right at the top of the stairwell?  Those are staying.  We have plans to add a bathroom in that space.  This will give us a lot more room to work with than our original plan of trying to squeeze a shower, sink and potty into a closet space.  

That's all for now...
Until we figure out what to do next.  YOIKS!


Monday, October 12, 2015

Some 2nd floor "Befores"


 Access to the upstairs is behind a door in the hallway.  
We have plans to open up this space, but that is in the future.
  
For now, Austin's dresser sits in the hallway because the boys' bedroom is too small to accommodate it.


Once you open the door, you are greeted with a very dark stairwell.

The stairs are U-shaped. 
U Shaped stairs are basically 2 parallel flights of straight stairs joined by a landing that requires a 180 degree turn to climb the whole way to the top.


When you reach the top floor, the first thing you see is a closet with wooden sliding doors.  We are hoping to turn this space into a small 2nd bathroom.  
That's a post all of it's own.


There are two bedrooms upstairs.  
One to the right and one to the left.  

This is the bedroom to the left.  


This is the other side of the left bedroom.  


And here is the bedroom to the right.  


The other side.


And now, after a full day of ripping and tearing, here is what the upstairs looks like.
 Right room....


 Left room.  
Check out that wiring...YIKES!


This wallpaper was uncovered in the left bedroom.
The original owners raised two boys.
Giddyup Partner!


Have a great day!

Wednesday, September 9, 2015

Laundry Room Floor

Today I am preparing the laundry room floor for painting. As you can see, we have a basement laundry room.  Goodness what a job!  The floor is so filthy from the work we've done so far. 

Knocking out stairs ... Building new stairs
Tearing out the old furnace ... Installing a new furnace
Ripping out old duct work ... Installing new duct work.
Ripping out old windows ... Installing new windows.
Jack hammering the floor to fix the drain ... THIS made the most mess!


I painted the walls several months ago.  
The color is Valspar's Gravity.

The color I chose for the floor is Valspar's Fountain Mist. 


Fingers crossed it will look nice.....YOIKS!

We are hoping to start demolition to the main part of our house soon.  But we need somewhere to house things like couches, chairs and bookshelves before we start.  Knocking out walls is messy business.  Our utility shelves need to be moved into the laundry room to make more space to store all the big stuff from upstairs.

We debated painting the floor in the laundry room.  I mean, why paint a floor only to make more mess?  But we decided, in the end, to just do it so we could move our big shelves in and BE DONE.  I really didn't want to have to paint under and around those big things.


Remember these?  These shelves house all the bins that contain holiday decorations and a bunch of other crap stuff. 

I've come to the conclusion that our house is very much like the "If You Give A Mouse A Cookie" book.  If you want to start demolition, you need to clear the space, if you want to clear the space, you need to make room for all the stuff ....... 

Monday, August 24, 2015

Feeling Moody With Mood Boards

I see all sorts of mood boards floating around Pinterest.  I wanted to have a try but I thought I needed Photoshop.  Thanks to this post from Home Made Modern Blog,  I found out how to do it in MS Word!  


WORD! 
WORD to your mother! (Vanilla Ice anyone?)
WORD UP! (for all you WordGirl fans)
If you type the word "word" enough times it starts to look funny.


Anywho.......
Work on the inside of our house has been non-existent.  The exterior sure is looking swell, but I'm getting antsy, fidgity and sometimes downright grumpy about the state of the interior of The Windmill Cottage.  


Remember last Christmas?
All of the interior windows still look like this!


Don't get me wrong!  I am so very thankful for this little cottage every single day.  I am in love with the place.  I just can't wait to get started on the gutting and remodel!  But I have to be patient. 

So to keep myself from going crazy, I dream about the interior and resort to Pinterest on a daily basis (if any of you follow me on Pinterest, sorry for the 18 billion pictures of white kitchens).

Back to mood boards and MS Word.  I started to play a little last night.  This is what I came up with for the small entryway from the back porch.


Turquoise and orange.

I would really like to use a turquoise damask wallpaper somewhere in our house. 
Mr. Windmill made a shoe cubby just like this one several years ago.   I love it!  The boys actually use it.  It makes shoe storage and organization a snap for all of us.  


 Black, white and grey.

I am usually attracted to rooms with a lot of color. But the black, white and grey often catches my attention.  

Oh well, Just playing around.  I have a LONG way to go before I can actually put rooms together.  

I'm hoping to get some pictures of the front porch to you soon.  We are waiting for some hardware to be delivered so we can finish the railing.  

Happy Monday everyone!  

I do not own any of the photos used in the mood boards.  
These boards were created for personal use to help me decide how to decorate our home.


Saturday, July 25, 2015

Front Porch Progress

Hello friends and family!

I am over the moon to get a front porch roof and railing!  I can't wait for our house to finally look "finished".  

I should be painting, but I decided to sit down and do a blog post (now there's some time management ....).  With a rain-free forecast, I've been finishing up painting the last side of the foundation.  


Anyway.......
Mr. Windmill got started on Monday.  
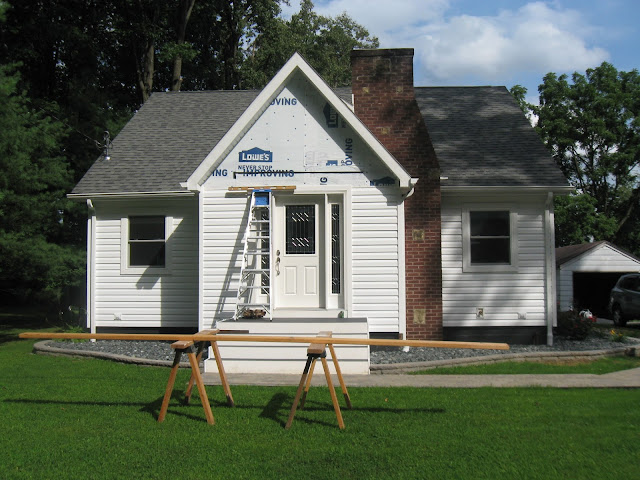
I'm sure all the neighbors were wondering why we never completed the siding in the front gable. 


A sheet of OSB to protect the door glass.
Smart move, Mr. Windmill!


And here it is!  A perfect shed roof.  
Mr. Windmill is A M A Z I N G !
I show him or tell him my ideas and he brings them to life!
He's patient too.  'Cause that roof design changed about 26 times before I settled.  Just ask my mom, she was the one who had to scrutinize a Pinterest board full of pictures and listen to me flip flop on all the pros and cons of each design.  
Thanks mom!


Thursday, July 16, 2015

Back Porch Railing

Mr. Windmill finished the railing on the back porch.  
And I couldn't be more in love!

Just a photo dump today. 
( I can't wait to paint that back door! )


Sunday, July 12, 2015

The Front Walkway

I haven't had a chance to show you the pictures of our finished paver walkway. 
Without further delay....... 


We still have to fill in around the walkway with topsoil and plant new grass.  
I'm not sure if we are going to leave the section between the retaining wall and the sidewalk with grass or fill it in with black mulch and some hostas.  I have to think on that for a while.


 Here you can see how it leads out to our gravel driveway. 


The polymeric sand set this time unlike our back patio which you can see here.
Things around the Windmill Cottage are slowly becoming less dirt and mud!  Yay!


Wednesday, July 1, 2015

Ground Breaking! To the Front, to the front..............

There seems to be just enough pause in the rain to do some ground breaking.  It's been raining every single day for nearly two weeks.  Hubs headed outside to layout the path for the front walkway.

 It's amazing what a tape measure, a roll of string and some stakes can do!  
Mr. Windmill (my hubs) had lots of help from Little A and Big C!


Mr. Windmill makes short work of digging.  He seriously is the digging master!  
He grew up on a farm...go figure!

Some landscape fabric and the first layer of gravel shown here.


 Little A taking his turn with the tamper.  I think that tool weighs as much as he does! 
And there's the stack of pavers waiting to transform into a front walkway!


 You can see the Knock-Out roses and the Stella lilies on the side of the house.  
They seem to be doing okay.  They could use a little more sun and little less rain!


Monday, June 22, 2015

A Little Patio

Hubby and I knew when we built the back porch that the gas grill would never be housed there. We've seen first hand the grease mess that splatters all over the place.  The deck at our old house had grease spots and stains all over.  And a friend of ours melted their vinyl siding from the extreme heat of their gas grill.  We purchased these pavers and set to work preparing to make a little patio.  We've never had any experience with installing pavers but thanks to the great internet, there are hundreds of tutorials out there.  I settled with this one from Better Homes and Gardens.  


 Here's a before.  I know your diggin' the 5 gallon bucket on the porch.  And the crammed up furniture.  I keep moving it back where it belongs but two little boys I know keep rearranging.  


A view from the top of the stairs.


Nearly ready for the pavers.  
We used cap blocks for the border.  


And the finished project.  We used a polymeric sand to fill the cracks.  This sand combines with polymers to make a solid but flexible filler.  It's supposed to keep the insects out and keep the pavers intact.  But it rained for a week straight after we installed this patio.  I've noticed that the sand didn't set properly. We may have to scrape and vacuum out what we can and redo later this summer.  We'll have to see. 


 See the baby grass starting to sprout around?  


Don't be jealous of my gorgeous flowers in those pots! 
 Just use your imagination!  That's what I do!  ;-) 

Saturday, May 30, 2015

BP and AP (Before Paint and After Paint)

Just wanted to post a quick before and after!

This morning, I had some time to sneak in the first coat of black paint while the boys watched Ratatouille.
The weather man is calling for thunderstorms later this afternoon.  I HAD to get out there and get a first coat applied.

You can see the Knock Out Roses at the far right of the picture.  They need to be planted, so I need to paint!  I'm hoping to get the 2nd coat of paint applied and the roses planted next week.


It's amazing what a little paint can do!


Have a great weekend!


Wednesday, May 27, 2015

Talking to a Brick Wall

Hubs has been working very hard on a raised flower bed around the house.  So, Yep, I'm talking to the brick wall.  "What should I put in you?  What will you retain?  I mean, after all, you ARE a retaining wall!  Do you want perennials, annuals, a little of both?  Do you get full sun, partial sun, mostly shade?"
I've been talking A LOT to the brick wall.  I think it listens as good as my kids.

Let's just say that landscaping WAS NOT on the agenda this spring.  We wanted to do more inside work than outside.  Our local big box home improvement store had a great sale on landscaping bricks, blocks, pavers and all things hardscaping.  That sale made it hard to pass up the savings.

What WAS on the agenda this spring was to paint the foundation.  Before the foundation can be painted, it needs to be cleaned.  And before it can be cleaned, we need to find a way to stop the dirt from splashing all over the block every time it rains.  The solution to this problem is simple.  Cover up the dirt.  So thanks to our local home improvement store, we found a way to cover up the dirt and save money.  Well at least we are retaining the dirt for now.  Covering the dirt is the next step.

Let's recap the side of the cottage.
This is what it looked like when we bought the house.


In this picture you can see evidence of a jackhammer that demolished the concrete and stone patio.
And no more mud room/ enclosed porch.


Here's the hubs getting a start on the retaining wall.


Wow!  What a difference!


And just a little peak of what's to come for the front of the house. 
We need to finish the front porch with a roof and railing.  We are hoping to get to that project this summer.  Fingers crossed!

This picture makes the retaining wall look like it slopes downward toward the front steps, but it is completely level.  It must be the angle at which I took the picture.  
That or the uneven yard.... Who knows.  

We are waiting on a masonry company to re-point and clean our chimney.  She really needs some love!  The company did an estimate in April.  It's now the end of May.  Let's hope masonry companies don't operate like tree cutting companies.  Ay yi yi!